Overall, I am disappointed that after all that hard work modelling and skinning I couldn’t actually get my animation to look realistic, and most of all, work.
I do think that I went way overboard and was way too ambitious with what I wanted to achieve (for someone who is extremely inexperienced with 3DS MAX) and didn’t truly think through the process of creating this animation. I had everything clear in my mind from a storyboard point of view, but from a technical point of view I did not think things through. For example, when skinning, I completely skinned every single model from head to toe, and none of these worked in the end. Nor did I need to because headshots obviously didn’t require the toes and legs to be skinned. I always make things too hard for myself and this was no exception.
This resulted in a lot of time being wasted on unnecessary things. In the end I do regret making such an imaginative and complex animation; I should have focused more on keeping it simple, to make it more successful on the whole.
If I were to use 3ds max in the future, or indeed any other projects I do in the future, I really need to really think things through from a technical point of view as well to really determine if I am actually capable of creating the work with my skill set, because I have simplified my animation greatly from the initial storyboard to just try and meet the deadline.
Thursday, 6 May 2010
My Animation
Here is the final video, in MP4 format. There was no option that I could find to export to AVI, the only suitable presets in Premiere Pro and Adobe Media Encoder were .MOV or .MP4.
---
*EDIT*
Upon uploading this file, it does not display correctly on my browser. The final video is not like that, it does work!
Finishing my animation
Due to the skinning problems I had that I could not fix, the quality of my final animation is not as good as intended. As stated, when the meshes had the materials applied the skinning went to pieces (after all that hard work) so I reverted back to the models before the materials were applied, (and I have proof that the skinning worked!) and animated these, but this also failed.
I was left with no other option than to show my audience the movements of my intended animation in the form of only the bipeds.
This does look bad, but due to time running out I had no other choice. An advantage to doing it this, is that if in the future I were to come back to this animation and somehow find a way to fix this problem, the basis for it is already done. All I would have to do is export the scene (the backgrounds, lights and camera(s) ) and save the moving biped file (.BIP) and apply it to the ‘fixed’ mesh(es). And hey presto, I have my animation.
At least with my moving bipeds you can see my intentions for the animation visually rather than just the paperwork. I included the necessary lighting and cameras so literally the only thing that needed sorting was the skinning problem.
Premiere Pro editing allowed me to add the sounds I recorded and give my animation a realistic touch.
Again, due to both the time constraints and my inexperience with 3DS MAX the scenes don’t look as good as they could. I am really disappointed because my primary objective so to speak was to make this animation look realistic, hence the great detail and focus on the modelling portion of this project. The materials like I said is where this went wrong, but I did struggle with materials last Semester also.
One last thing is that I do not understand how the walking animaton I have at the beginning works ok (the skinning mucks up and the legs do not move how I made them move in the MAX file originally – 3DS mucking up my work again!) and the latter files do not even have a moving mesh let alone an almost complete scene. I just cannot comprehend it.
More problems
I have tried and tried and tried again to get my models to animate correctly, and to no avail.
A problem I have come to face is the skinning, but I cannot figure out the problem.
When I move the biped, the skinning works fine, I have skinned correctly and the mesh moves accordingly:
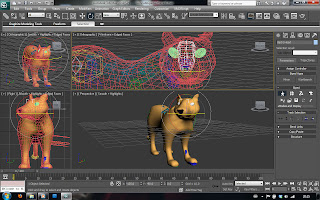
But as soon as I go to the motion panel, and move the biped in exactly the same way, only the biped moves. It's so strange.
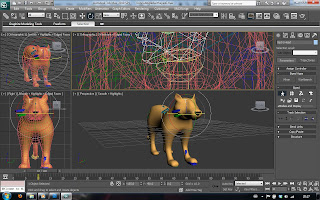 (I had turned autokey off before taking this screenshot, and I tried doing this out of figure mode because an error came up saying that keys cannot be made whilst in fugure mode. Everything I tried did not work.
A problem I have come to face is the skinning, but I cannot figure out the problem.
When I move the biped, the skinning works fine, I have skinned correctly and the mesh moves accordingly:

But as soon as I go to the motion panel, and move the biped in exactly the same way, only the biped moves. It's so strange.
 (I had turned autokey off before taking this screenshot, and I tried doing this out of figure mode because an error came up saying that keys cannot be made whilst in fugure mode. Everything I tried did not work.
Wednesday, 5 May 2010
Animation Problems
As a result of the last problem, I decided to go back to my original models to animate (the ones where the skinning was successful. Now, I thought I could at least get the motions I intended my models to do shown, even if there were no materials used.
Upon trying this, now even these models will not work. I tried importing a .BIP file to make the fox walk that is shown a few posts ago, and that completely messed up the files.
I then tried this with my jumping fox cub. The idea I had was to import the fox cubs into the scene with the mummy fox and have one walking and two jumping along to give a bit of variety. I created the .BIP file and saved it.
Shown is my attempt at applying this to the old mesh using the mixer.
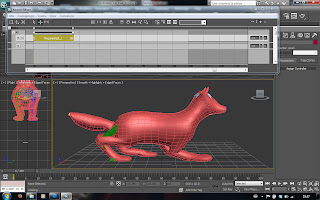
As you can see, 3DS Max recognises the fact that the mesh has been moved as soon as it is imported, and as it has been skinned the mesh moves accordingly. (My skinning with the hind legs was not as good as I initially thought because the 'bone' is protruding from the rear end of the mesh). However upon rendering you can see below that even though the skinning is successful (and even once modified upon selecting the skin modifier on the right hand side menu and showing envelopes actually shows my skinning is still in tact) the biped is seperated from the mesh.
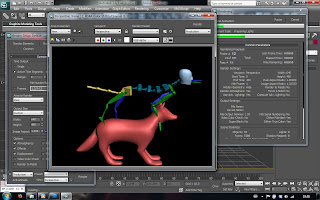 And post-rendering, the fox mesh regains it's original position rather than still being squatted down as shown above in this post. So upon rendering everything goes wrong!
Upon trying this, now even these models will not work. I tried importing a .BIP file to make the fox walk that is shown a few posts ago, and that completely messed up the files.
I then tried this with my jumping fox cub. The idea I had was to import the fox cubs into the scene with the mummy fox and have one walking and two jumping along to give a bit of variety. I created the .BIP file and saved it.
Shown is my attempt at applying this to the old mesh using the mixer.

As you can see, 3DS Max recognises the fact that the mesh has been moved as soon as it is imported, and as it has been skinned the mesh moves accordingly. (My skinning with the hind legs was not as good as I initially thought because the 'bone' is protruding from the rear end of the mesh). However upon rendering you can see below that even though the skinning is successful (and even once modified upon selecting the skin modifier on the right hand side menu and showing envelopes actually shows my skinning is still in tact) the biped is seperated from the mesh.
 And post-rendering, the fox mesh regains it's original position rather than still being squatted down as shown above in this post. So upon rendering everything goes wrong!
Skinning problems
Ok, so as you can see by the last post, I had trouble with the skinning. Now I could not figure this out because the skinning worked perfectly (as shown).
After a lot of playing and a hell of a lot of thought, I decided it must have been the materials that were used. Surely enough, after the UVW map was applied, the skinning went to pot:
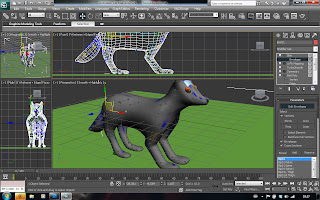
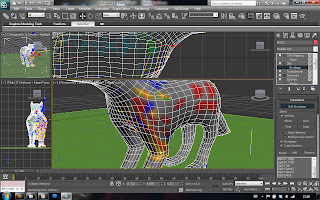
I was going to retry skinning my models. After a lot of thought, what with the deadline creeping in, I really thought about what I had to skin this time. (The first time round, I completely skinned every model in detail (unnecessary detail). I decided that all I needed to do with my new simplified animation was the lion and lion cub's head and shoulders, and the fox and fox cubs' whole bodies.
However, after a lot of time spent wasted on trying to re-skin jus one leg of the fox, 3DS max kept changing the skinning without me actually doing anything to those vertices. It actually wouldn't let me change some as well.
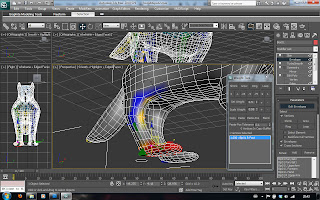
So after all that time wasted the first time round, when it worked absolutely fine, now the skinning just will not work at all.
After a lot of playing and a hell of a lot of thought, I decided it must have been the materials that were used. Surely enough, after the UVW map was applied, the skinning went to pot:


I was going to retry skinning my models. After a lot of thought, what with the deadline creeping in, I really thought about what I had to skin this time. (The first time round, I completely skinned every model in detail (unnecessary detail). I decided that all I needed to do with my new simplified animation was the lion and lion cub's head and shoulders, and the fox and fox cubs' whole bodies.
However, after a lot of time spent wasted on trying to re-skin jus one leg of the fox, 3DS max kept changing the skinning without me actually doing anything to those vertices. It actually wouldn't let me change some as well.

So after all that time wasted the first time round, when it worked absolutely fine, now the skinning just will not work at all.
Animating
Here is where I will write about animating.
This is my first complation in Premiere Pro to see if the exports worked. It is very fast because I didnt adjust the framerate etc of the render.
This is my first complation in Premiere Pro to see if the exports worked. It is very fast because I didnt adjust the framerate etc of the render.
Tuesday, 4 May 2010
Materials
The materials is where everything started to go wrong. I always wanted my models to look realistic, and upon thinking about it now it probably would have been better to have my models as simply colours. This would have saved the need for a UVW map.
The UVW map made the models look horrible. Starting with the fox and the fox cub, I tried to get an image of a foxes fur to make the model look like it was covered in fur, as the hair and fur modifier would have been horrible to animate and having had previous experience with that modifier I cannot control it.After playing with the UVW map for hours, I had to settle for what it currently looks like and move on, as the deadline was drawing in. All that hard work to get the models look like a realistic shape and they look disastrous.
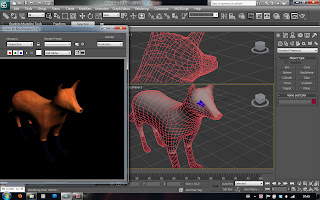
Then, the eyes. I could not get the eyes to position correctly with the UVW map. I had 4 polygons where the eye was supposed to show and again playing for hours to no avail.
I HATE 3DS MAX!
I created a sphere and moulded it to more of an oval shape to suit the model. I then seperately set the material for the eye to this sphere and placed it halfway into the model. This looked semi-decent so I settled for this option and reiterated it for all my models.
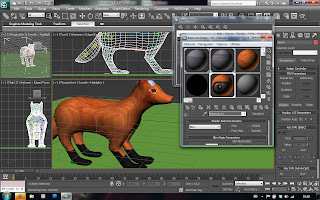
I then found that when moving the head, the eyeballs as it where did not move. After a little investigation it was found that I could 'weld' the eyes to the biped (and in the end this is about one of the only things that still works).
For the lions I did decide to use a simple colour all over save for the eyes as mentioned earlier.
For the lion (male) I converted the skinned model to an editable mesh, (as it had been turbosmoothed, I had more polygons to play with!). I dragged multiple vertices out to create 'spikes' of hair for the mane and set a seperate material ID for the mane area and coloured it a deep brown. This turned out quite successfully. Even though it was simple I think it worked quite well.
The UVW map made the models look horrible. Starting with the fox and the fox cub, I tried to get an image of a foxes fur to make the model look like it was covered in fur, as the hair and fur modifier would have been horrible to animate and having had previous experience with that modifier I cannot control it.After playing with the UVW map for hours, I had to settle for what it currently looks like and move on, as the deadline was drawing in. All that hard work to get the models look like a realistic shape and they look disastrous.

Then, the eyes. I could not get the eyes to position correctly with the UVW map. I had 4 polygons where the eye was supposed to show and again playing for hours to no avail.
I HATE 3DS MAX!
I created a sphere and moulded it to more of an oval shape to suit the model. I then seperately set the material for the eye to this sphere and placed it halfway into the model. This looked semi-decent so I settled for this option and reiterated it for all my models.

I then found that when moving the head, the eyeballs as it where did not move. After a little investigation it was found that I could 'weld' the eyes to the biped (and in the end this is about one of the only things that still works).
For the lions I did decide to use a simple colour all over save for the eyes as mentioned earlier.
For the lion (male) I converted the skinned model to an editable mesh, (as it had been turbosmoothed, I had more polygons to play with!). I dragged multiple vertices out to create 'spikes' of hair for the mane and set a seperate material ID for the mane area and coloured it a deep brown. This turned out quite successfully. Even though it was simple I think it worked quite well.
Skinning the models
Skinning, at first, seemed easy. Having watched a video tutorial, I picked it up quickly (or so I thought).
It was recommended that you use mainly only 1, 0.75 and 0.5 settings when assigning parts of the mesh to the biped, unlike when the model is automatically skinned and ranges to 0.1 showing blue on the mesh.
This seemed pretty simple, and I kept my meshes completely red, orange and yellow.
I skinned each of the four types of model exactly the same, assigning the vertices in the direct vicinity of the "bones" to be attached to it.
(pic of skinning)
I found the 'loop' tool very handy especially working with four legs as there was always something to worry about in the background so I couldn't drag across the screen.
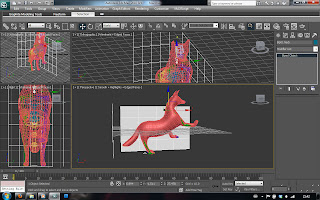
I have proof below that my skinning did actually work quite successfully by manipulating the mesh out of its original shape:

Creating The Bipeds
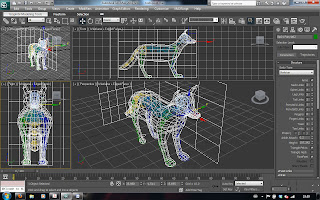
Creating the bipeds was actually surprisingly easy. I firstly made the biped for the fox, fitting it exactly to the mesh. I then copied it to each of the other models and manipulated it as necessary.
Starting with a two-legged human was a tad weird. Rotating the body onto it's front was a good start. moving the legs and adjusting the bone structure took a few tries and after a little experimentation I decided to just have the back legs exactly the same as a humans only facing backwards (rather than having an extra link).
I decided to seperate the tail into three links as not much movement was needed.
The ponytail was a good way to manipulate the jaw.

Subscribe to:
Posts (Atom)